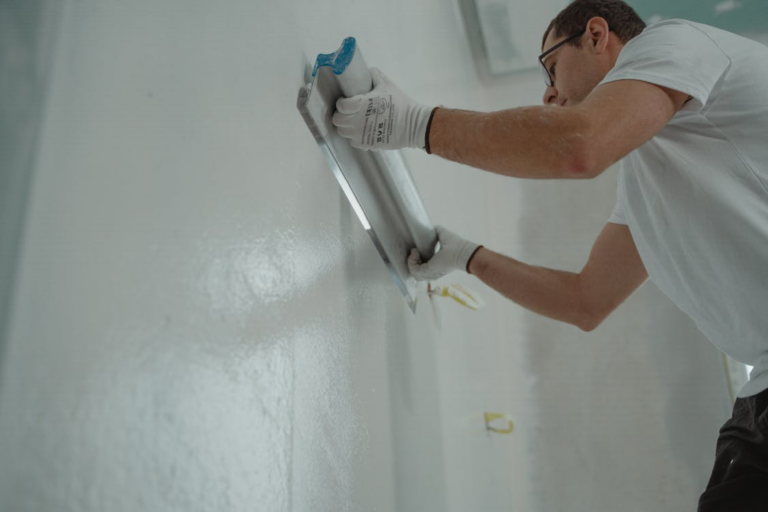
How well you prepare surfaces determines how your finished paintwork will look and last. If you’d like those fine edges—smooth lines, sealed gaps, and professional results—understand that you need to caulk before you paint. All joints, seam work, and corners must be done by experienced service practitioners in turn so that time, effort, and expensive repainting are saved later.
Why Preparation Is More Important Than You Think
Before single brushstrokes, surface readiness is all you need for the right outcome. When do you trust professionals who know how to caulk before painting? You shield walls, trim, and fixtures from moisture damage, cracking, and uneven finishes.
This preparation lays the groundwork for long-lasting, clean, and beautiful effects in both homes and commercial areas.
- Grasp Your Surface Conditions Before Use
Skilled experts take careful measurements on every single surface before caulking starts. You gain the benefit of trained eyes that see shrinking joints, hidden cracks, or structural movement.
This analysis helps fine-tune material selection and the timing of application. Their method for how to caulk before painting ensures no weak spots remain untreated.
- The Right Caulk to Use for Various Areas
Materials react differently to sealing compounds and require specific types. Different caulk types are required for wood, drywall, metal, tile, and masonry. Professionals help you avoid mismatched products that can fail prematurely.
These are very important selections when applying caulk before paint to make sure the adhesion is strong, flexible, and lasting across a variety of interior spaces.
- Cleaning and Preparing the Surface Accurately
Expert services clean surfaces well so that caulk sticks properly and evenly. You avoid bubbling, cracking, and peeling from rushed preparation.
So, surface conditioning from a professional sets the definitive first step to mastering how to caulk before painting for both residential and commercial interiors.
- Correct Gap Fixing and Closing
Not every joint will need the same treatment. Structural gaps, cosmetic seams, and expansion zones necessitate specific procedures. Professionals know that movement, vibration, and temperature changes affect sealing.
This knowledge keeps joints sealed without restricting flexibility, setting the table for best practices for how to caulk before painting while maintaining long-term performance.
- Controlled Application Methods
Application precision is important. Professionals apply smooth, consistent beads at even pressure and uniform thickness. There’s no sagging line or messy edges.
Controlled techniques ensure joints blend seamlessly into surrounding surfaces, directly supporting caulk before painting by providing clean, crisp transitions perfect for flawless final finishes.
- Drying and Curing Management
Every caulk type demands specific drying times and is sensitive to humidity and temperature. Professionals schedule these periods carefully and allow full curing before applying paint.
This ensures surface damage and adhesion issues do not occur. Managing curing timelines is a critical aspect of applying caulk before painting, particularly in large commercial and multi-room residential projects.
- Preservation of Architectural Aspects and Design Features
Decorative trim, molding, window frames, and built-in fixtures must all be considered. Expert teams protect these features while sealing gaps invisibly.
This precision preserves design integrity and craftsmanship. How to caulk before painting is a process that is both appealing and functional in living and working spaces.
- Minimizing Long-Term Maintenance Needs
Caulking should be done right to prevent moisture intrusion, dust accumulation, and air leakage. This prevents cracking, mold growth, and paint failure.
Over time, you gain lower maintenance costs and a uniform visual appeal. Professional handling of caulking before painting preserves surface stability and finish quality for years.
“According to a source, homeowners can save around 10% on total energy costs by using sealant.”
- Ensuring Clean Lines and Sharp Edges
Professional painting is characterized by sharp transitions. With the correct caulk, shadows, uneven edges, and visible seams disappear. Professionals shape joints to serve as visually balanced boundaries that enhance the final look.
Your success with caulk before painting depends on attention to detail across diverse room configurations and architectural designs.
- Supporting Long-Term Paint Performance
Stable, sealed joints play a huge role in paint longevity. Paint lasts longer when gaps are properly filled; otherwise, it cracks and peels. This support helps with color retention and finish clarity.
Professional execution of caulk before painting creates resilient surfaces that withstand daily wear in homes, offices, retail spaces, and commercial buildings.
- Minimizing Disruption During Project Execution
Structured workflows and scheduling allow professionals to complete projects efficiently. You experience little downtime and limited disruptions to daily routines.
Expert operational discipline should be reflected in how caulking is done before painting: smooth transitions between preparation and painting without unnecessary delays or surface damage.
- Achieving Consistency Across Multiple Rooms and Zones
Consistency in joint size, texture, and smoothness contributes to visual harmony. Professionals maintain consistent standards throughout hallways, rooms, offices, and shared areas.
This disciplined execution enhances aesthetic continuity and reinforces how to caulk before painting as a structured, results-oriented process rather than a rushed task.
- Preventing Common Application Errors
Visible flaws caused by overfilling, smearing, uneven pressure, and premature painting are defects. Skilled crews eliminate these mistakes through training and experience.
Their precision reduces material waste and ensures smooth finishes, strengthening outcomes associated with how to caulk before painting in both residential and commercial environments.
- Enhancing Property Appeal and Functional Value
Sealed joints build interior appeal while supporting surface durability. Polished finishes create welcoming atmospheres that affect comfort, efficiency, and perception.
Professional execution of caulk before painting directly enhances property appeal, supporting long-term usability and maintaining polished, professional-grade interiors.
- Tailoring Solutions for Unique Space Requirements
Properties have various surface challenges, layout complexities, and design goals. Professionals customize their techniques to suit specific conditions, ensuring optimal results.
This adaptability defines the effectiveness of how to caulk before painting, delivering tailored outcomes that work seamlessly for both residential comfort and commercial functionality.
Professional Guide to Caulking Before Painting: Key Steps and Benefits
| Aspect | Professional Approach | Key Benefits |
| Surface Prep | Deep cleaning, inspection, and analysis. | Strong bonding, flawless finish. |
| Caulk Selection | Material-specific product choice. | Long-lasting flexibility and adhesion. |
| Gap Treatment | Precision sealing and shaping. | Smooth edges, crack prevention. |
| Application | Controlled bead placement. | Neat lines, uniform appearance. |
| Drying Process | Proper curing time management. | Prevents peeling and bubbling. |
| Detailing | Protects trim and fixtures. | Preserves design integrity. |
| Long-Term Impact | Professional sealing methods. | Durability, lower maintenance, and visual appeal. |
Frequently Asked Questions
- Why is caulking important before painting walls?
> Caulking seals small gaps and cracks, preventing paint bleed-through, improving finish quality, and creating a smooth, polished surface that helps paint adhere evenly and last longer.
- What type of caulk works best before painting?
> Paintable latex or acrylic caulk is ideal because it dries quickly, accepts paint smoothly, remains flexible, and effectively fills gaps without cracking or shrinking over time.
- How long should caulk dry before painting?
> Most caulks need at least 30 minutes to an hour before painting, but full curing can take up to 24 hours, depending on humidity, temperature, and caulk type.
- Can skipping caulk affect final paint results?
> Yes, skipping caulk often leads to visible cracks, uneven edges, and paint seepage, reducing visual appeal and causing premature wear that impacts the durability of your painted surfaces.
- Should old caulk be removed before repainting?
> Removing damaged or peeling caulk ensures better adhesion, smoother application, and a cleaner finish, preventing uneven texture and extending the life of the new paint job.
To Wrap Things Up
At BK Painting, expert caulking lays the foundation for a smooth, durable paint finish. We seal, refine, and perfect every edge for stunning results. Want a paint job that truly stands out? Schedule your caulk-before-paint service with BK Painting today and let precise craftsmanship elevate your space.